I MADE UP this recipe for caffeinated muffins. For reals, I did! And so I am not even going to Google anything about it, because if someone else already made it up I will be so disappointed! And what at if they, too, came up with the name “Buzz Muffins”? Life will seem so grim, so repetitive, so “There is nothing new under the sun.” It is not worth the emotional stress. So if you already have this recipe, be kind to me and don’t tell me. …Unless we’re talking about knee-breaking/jail-term kind of repercussions, in which case tell me.
There are two basic variations: the ones that taste kind of like coffee, and the ones that don’t.
Buzz Muffins: The Ones That Taste Kind of Like Coffee
1/2 cup very strong coffee
1/2 cup (1 stick) butter, melted
5 caffeine tablets, 200 mg caffeine each
2 eggs
2 cups flour
1 cup sugar
1/4 teaspoon salt
2 teaspoons baking powder
Icing (optional but recommended)
1 cup powdered sugar
1.5 tablespoons very strong hot coffee
This recipe is going to sound like a lot of FUSS, because I can’t just say “Mix this and that together,” but it wasn’t too fussy to DO, it’s just fussy to EXPLAIN.
Preheat over to 375 degrees F. See? This isn’t too fussy yet!
I started by brewing the coffee. I used two tablespoons of Starbucks ground coffee and 8 ounces of water. When it was done brewing, I poured the coffee into a cup and then back into the filter basket (NOT into the water part of the coffee maker, but right on top of the grounds, slowly) and let it trickle through the grounds again. I used a cup so I wouldn’t have the coffee pot in my hand when the coffee started re-trickling down, especially since I needed to pour it kind of slowly. Allowing for the water lost to steam and to making the grounds all soggy, I ended up with almost exactly the right amount for the muffins plus the icing plus a wee swig for the cook (I mixed it into a cup of hot chocolate).
Meanwhile, I melted the butter in a 4-cup glass bowl in the microwave. When it was melted, I stirred in 1/2 cup of the coffee.
I put the caffeine tablets (my Target sells the Jet-Alert brand, and they’re right next to the sleeping pills—a little hard to find because it’s such a small section) into a little bowl, and I used the handle of a wooden spoon to grind them into powder. Then I stirred the powdered caffeine tablets into the butter/coffee. I used the tablet-crushing bowl to fork-whisk the eggs, then added the eggs to the coffee/tablets/butter bowl.
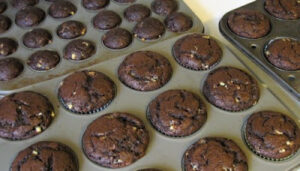
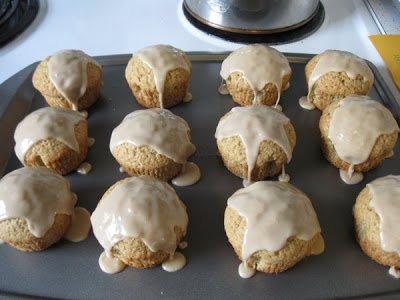
In another, larger bowl I mixed the flour, sugar, salt, and baking powder. Then I poured the coffee/tablets/butter/eggs into there and mixed it up. It makes a relatively soupy muffin batter, almost like thick pancake batter. I divided it among 12 greased or papered muffin cups (my #20 disher was perfect for this: 12 level disher-fulls almost exactly) and baked for 22 minutes at 375 degrees F.
While they baked, I made the icing. I mixed the powdered sugar with about a tablespoon and a half of hot coffee and stirred the dickens out of it until there were no lumps.
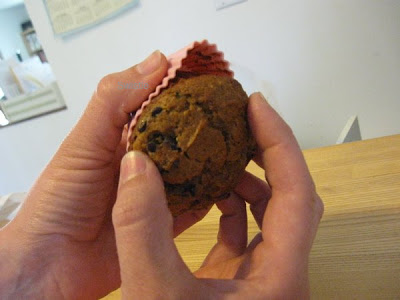
When the muffins are out of the oven and have cooled for a few minutes (five?), peel off the muffin papers (if you used muffin papers), put the muffins on plates or a cookie sheet or something, and put about a half-spoonful (whatever Regular-Sized Spoon came with your flatware) of icing on top of each muffin. It will drip down the sides of the muffins; this is why we take the papers off, so we don’t face the choice of licking muffin papers or consigning delicious icing to the trash.
The batch of 12 muffins has about the same amount of caffeine as 11 eight-ounce cups—so, nearly a cup of coffee per muffin. If you felt like adding a couple more crushed tablets to up the caffeine, I think that would probably work fine—but I’d start getting nervous about UNEVEN DISTRIBUTION, and also it’s nice to make them light enough on caffeine that people can eat two, or can eat one WITH some coffee. You could also REDUCE the number of caffeine tablets, of course.
If you don’t like the taste of coffee but want the caffeine, substitute milk or juice or water for the 1/2 cup of coffee in the muffins, and also substitute milk or juice or water for the 1.5 tablespoons of coffee in the icing, and also add a sixth crushed caffeine tablet to the recipe. This will make a very PLAIN-tasting muffin, but you can add flavored extract (orange, vanilla, lemon, etc.) to both the batter and the icing: about 2 teaspoons to the batter and 1 teaspoon to the icing, depending on the strength of the flavoring (if adding to the icing, reduce milk/water/juice by the amount of extract you use; in batter, it doesn’t matter). Here’s a version I tried:
Buzz Muffins: The Ones That Don’t Taste Like Coffee
1/2 cup orange juice
1/2 cup (1 stick) butter, melted
6 caffeine tablets, 200 mg caffeine each
2 eggs
2 teaspoons lemon extract
1 teaspoon dried lemon peel
2 cups flour
1 cup sugar
1/4 teaspoon salt
2 teaspoons baking powder
Icing (optional but recommended)
1 cup powdered sugar
scant 1/2 teaspoon lemon extract
1 tablespoon hot water
And the instructions are just a modified version of the ones above:
Preheat over to 375 degrees F. See? Basically the same.
If you think of it ahead of time, put the eggs and the orange juice on the counter for awhile before you get started, so they’ll be room temperature. Otherwise their coldness can make the melted butter clump up. If you don’t think of it ahead of time, put the eggs and orange juice in a pyrex bowl and put it on the OFF back burner of your pre-heating oven, assuming your oven vents extra heat out the back burner like mine does. This’ll warm them up a bit while you work on other steps.
I melted the butter in a 4-cup glass bowl in the microwave. When it was melted, I stirred in the room temperature orange juice and egg.
I put the caffeine tablets into a little bowl, and I used the handle of a wooden spoon to grind them into powder. Then I stirred the powdered caffeine tablets into the butter/juice/egg. Then I added the lemon extract and dried lemon peel (you could use fresh here, or you could use one and not the other, or whatevs—I was just winging it with what I had on hand; it’s hard to get a nice strong lemon flavor in baked stuff, without resorting to that stuff they use in Hostess fruit pies) (mmmmmm, Hostess fruit pies).
In another, larger bowl I mixed the flour, sugar, salt, and baking powder. Then I poured the juice/tablets/butter/eggs into there and mixed it up. It makes a relatively soupy muffin batter, almost like thick pancake batter. I divided it among 12 greased or papered muffin cups (my #20 disher was perfect for this: 12 level disher-fulls almost exactly) and baked for 22 minutes at 375 degrees F.
While they baked, I made the icing. I mixed the powdered sugar with a scant half-teaspoon of lemon extract and a tablespoon of hot tapwater (oooh, I should have used orange juice), and stirred until there were no lumps.
When the muffins are out of the oven and have cooled for a few minutes (five?), peel off the muffin papers (if you used muffin papers), put the muffins on plates or a cookie sheet or something, and put about a half-spoonful (whatever Regular-Sized Spoon came with your flatware) of icing on top of each muffin. It will drip down the sides of the muffins; this is why we take the papers off, so we don’t face the choice of licking muffin papers or consigning delicious icing to the trash.
Other ideas:
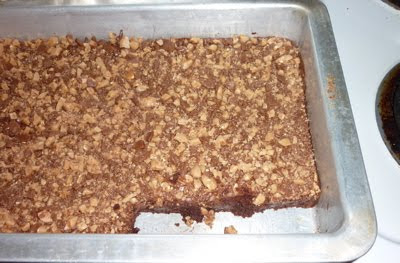
It would also be yummy to add chocolate chips or butterscotch chips, or use melted chips in place of the icing, and I’m going to see if I can come up with a Coffee Creamer Flavor by using milk and adding vanilla and nut extracts.
Caution: These are kind of like Caffeinated Jello Shots: a novelty item not for kids to get into, and adults should be warned about the contents. I’m planning to store these as “out of reach” as I store the caffeine tablets themselves—maybe a little MORE out of reach, since the tablets look like medicine and the muffins DON’T. I also labeled the ziploc with “CAFFEINATED MUFFINS” in huge letters.